1. Prepare IoT Hub and Device for this example
1.1. Developer PC - Generate Device self-signed certificates
[MUST] Please follow up tutorial-x509-self-sign
At last stage, you need to run the following command for making .pem file:
openssl x509 -in prov_device1.crt -out prov_device1.pem -outform PEM
For your reference, prepare example log as below: Notice! device ID = "W5100S_EVB_PICO_PROV_X509"
MINGW64 ~/certi
$ openssl genpkey -out prov_device1.key -algorithm RSA -pkeyopt rsa_keygen_bits:2048
............+++++
...................................+++++

MINGW64 ~/certi
$ openssl req -new -key prov_device1.key -out prov_device1.csr
You are about to be asked to enter information that will be incorporated
into your certificate request.
What you are about to enter is what is called a Distinguished Name or a DN.
There are quite a few fields but you can leave some blank
For some fields there will be a default value,
If you enter '.', the field will be left blank.
-----
Country Name (2 letter code) [AU]:.
State or Province Name (full name) [Some-State]:.
Locality Name (eg, city) []:.
Organization Name (eg, company) [Internet Widgits Pty Ltd]:.
Organizational Unit Name (eg, section) []:.
Common Name (e.g. server FQDN or YOUR name) []:W5100S_EVB_PICO_PROV_X509
Email Address []:

Please enter the following 'extra' attributes
to be sent with your certificate request
A challenge password []:
An optional company name []:

MINGW64 ~/certi
$ openssl x509 -req -days 365 -in prov_device1.csr -signkey prov_device1.key -out prov_device1.crt
Signature ok
subject=CN = W5100S_EVB_PICO_PROV_X509
Getting Private key

MINGW64 ~/certi
$ openssl x509 -in prov_device1.crt -out prov_device1.pem -outform PEM

MINGW64 ~/certi
$ ls
prov_device1.crt  prov_device1.key prov_device1.csr  prov_device1.pem

MINGW64 ~/certi
$
1.2. Azure portal
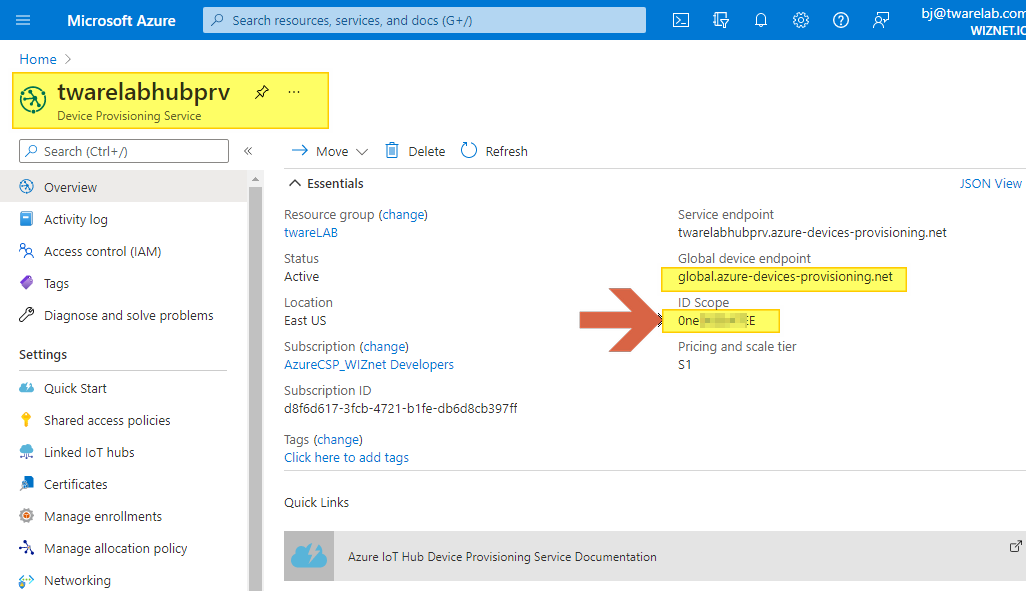
1.2.1. Create Azure Device Provisioning service
[MUST] For Device Provisioning service creation, please follow up the Quickstart: Set up the IoT Hub Device Provisioning Service with the Azure portal document first.
- After creating DPS, get your "ID Scope" value
1.2.2. Link to Azure IoT Hub & DPS
Connect DPS and IoT Hub service

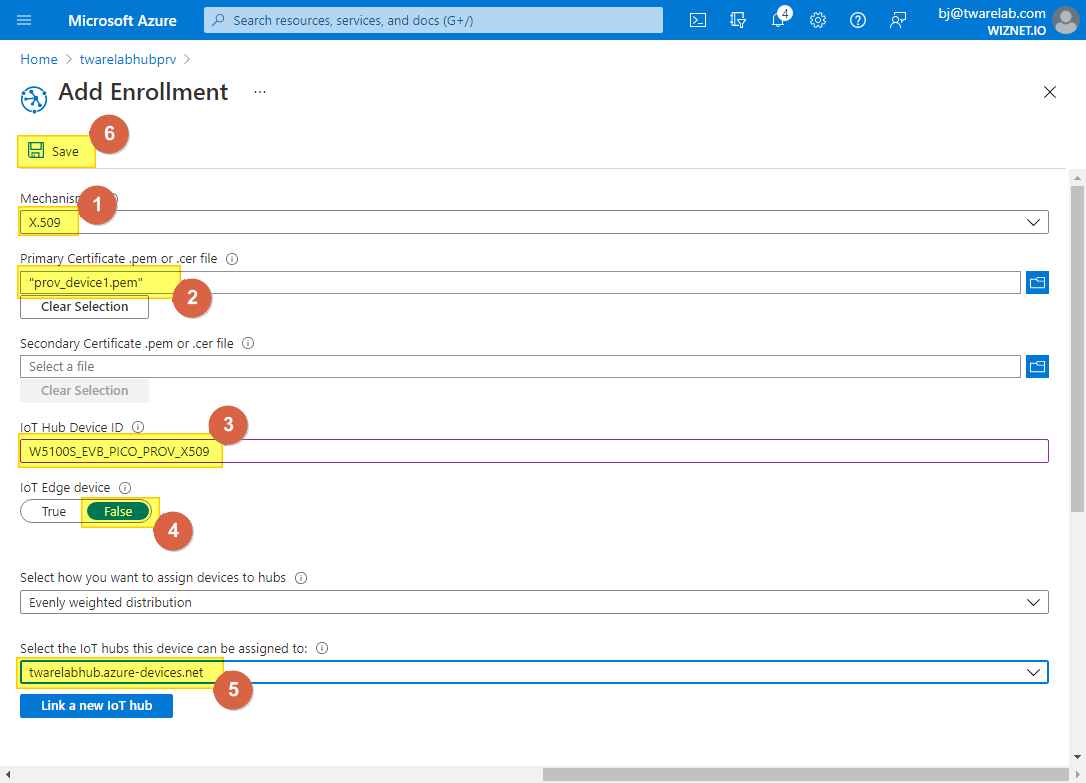
1.2.3. Create a device enrollment
Add individual enrollment

Use "prov_device1.pem" file generated in previous section
Check "Individual Enrollments" list

For more details,
- please refer How to manage device enrollments with Azure portal
- OR please read Quickstart: Provision an X.509 certificate simulated device document as well.
1.3. Developer PC - SDK setting
- Get the key value from files (prov_device1.crt, prov_device1.key) as below:

- Edit /pico-azure-iot-sdk-c/application/sample_certs.c with generated certificates as upper. For Common name, Use "W5100S_EVB_PICO_PROV_X509" used in key generation.
- pico_az_CERTIFICATE and pico_az_PRIVATE_KEY use key value from files (prov_device1.crt, prov_device1.key)
- pico_az_id_scope use "ID Scope" string from 1.2.1. Create Azure Device Provisioning service
- pico_az_COMMON_NAME use "device ID" from 1.1. Developer PC - Generate Device self-signed certificates

In the following pico-azure-iot-sdk-c/application/main.c source file, find the line similar to this and replace it as you want:
(...)

// The application you wish to use should be uncommented
//
//#define APP_TELEMETRY
//#define APP_C2D
//#define APP_CLI_X509
#define APP_PROV_X509

(...)

// The application you wish to use DHCP mode should be uncommented
#define _DHCP
static wiz_NetInfo g_net_info =
    {
        .mac = {0x00, 0x08, 0xDC, 0x12, 0x34, 0x11}, // MAC address
        .ip = {192, 168, 3, 111},                    // IP address
        .sn = {255, 255, 255, 0},                    // Subnet Mask
        .gw = {192, 168, 3, 1},                      // Gateway
        .dns = {8, 8, 8, 8},                         // DNS server
#ifdef _DHCP
        .dhcp = NETINFO_DHCP                         // DHCP enable/disable
#else
        // this example uses static IP
        .dhcp = NETINFO_STATIC
#endif
1.4. Developer PC - Build
Run make command

1.5. Developer PC - Serial terminal open
Open "COM" port to see debug code

2. Run the example code
2.1. copy main.uf2 file into your Pico board

2.2. Azure IoT Explorer (preview) log
Click "Refresh" until you find a provision device name

- After few seconds, you can find provison device from device list as belew:

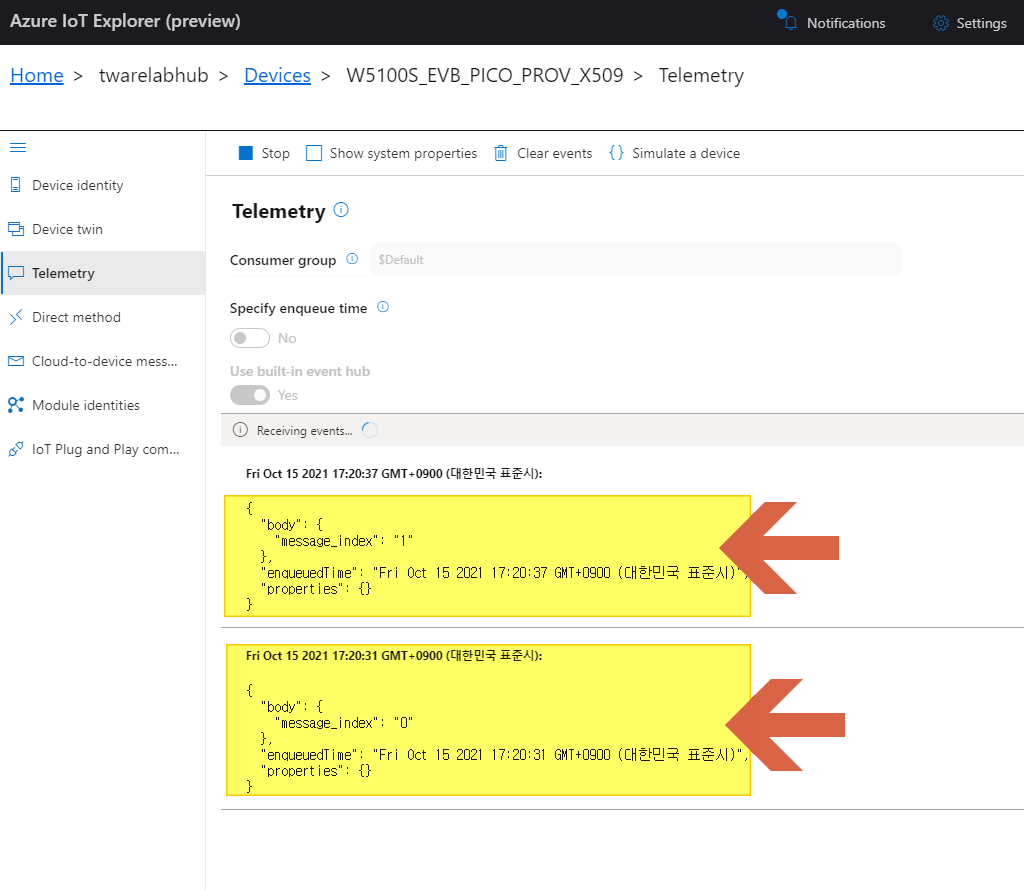
Go to "Telemetry" menu, click "Start", and wait for incoming messages

2.3. Serial terminal log
Connect to Azure DPS (Device Provisioning Server)
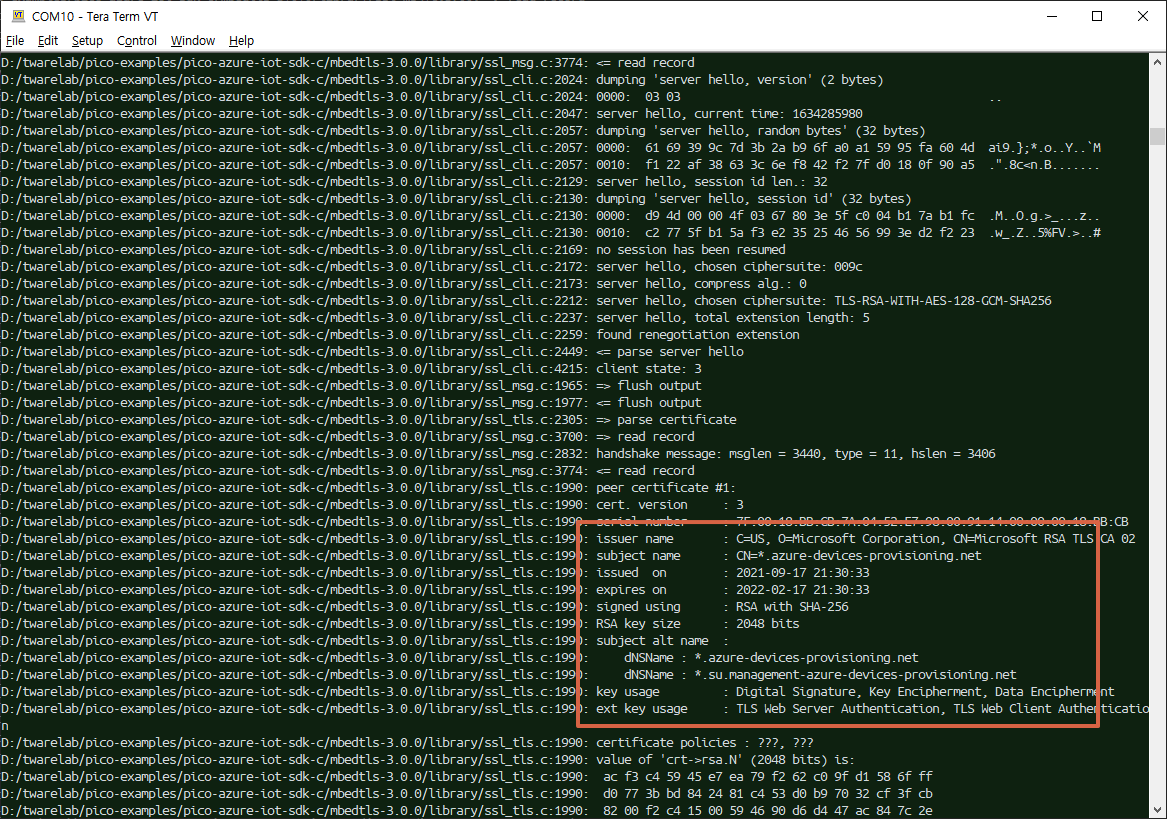
Provision work is done

Send 2 messages to Azure IoT hub

2.4. Azure IoT Explorer (preview) log
You can see 2 messages from device as below: